iPhone ඡායාරූප ස්ථානය නොපෙන්වීම විසඳන්නේ කෙසේද?
In today’s digital age, our smartphones serve as personal memory vaults, capturing every precious moment of our lives. Among the myriad features, one that adds a layer of context and nostalgia to our photos is location tagging. However, it can be quite frustrating when iPhone photos fail to display their location information. If you find yourself in this predicament, fear not, as we delve into the reasons behind this issue and explore effective solutions.
1. Why Are iPhone Photos Not Showing Location?
Before delving into the solutions, it’s essential to grasp why your iPhone photos might not be displaying their location information:
Location Services Disabled : If you’ve inadvertently turned off location services for your camera app, your photos won’t be tagged with location data.
රහස්යතා සැකසීම් : iOS offers granular control over app permissions. If you’ve denied the camera app access to your location, it won’t be able to tag your photos with location information.
දුර්වල GPS සංඥා : Sometimes, your iPhone might struggle to obtain a strong GPS signal, resulting in inaccurate or missing location data.
මෘදුකාංග දෝෂ : Like any electronic device, iPhones aren’t immune to software bugs. An underlying software issue might be preventing your photos from displaying location information.
2. How to Resolve iPhone Photos Not Showing Location?
Now, let’s explore the step-by-step solutions to rectify this vexing issue:
2.1 Enable Location Services for Camera App
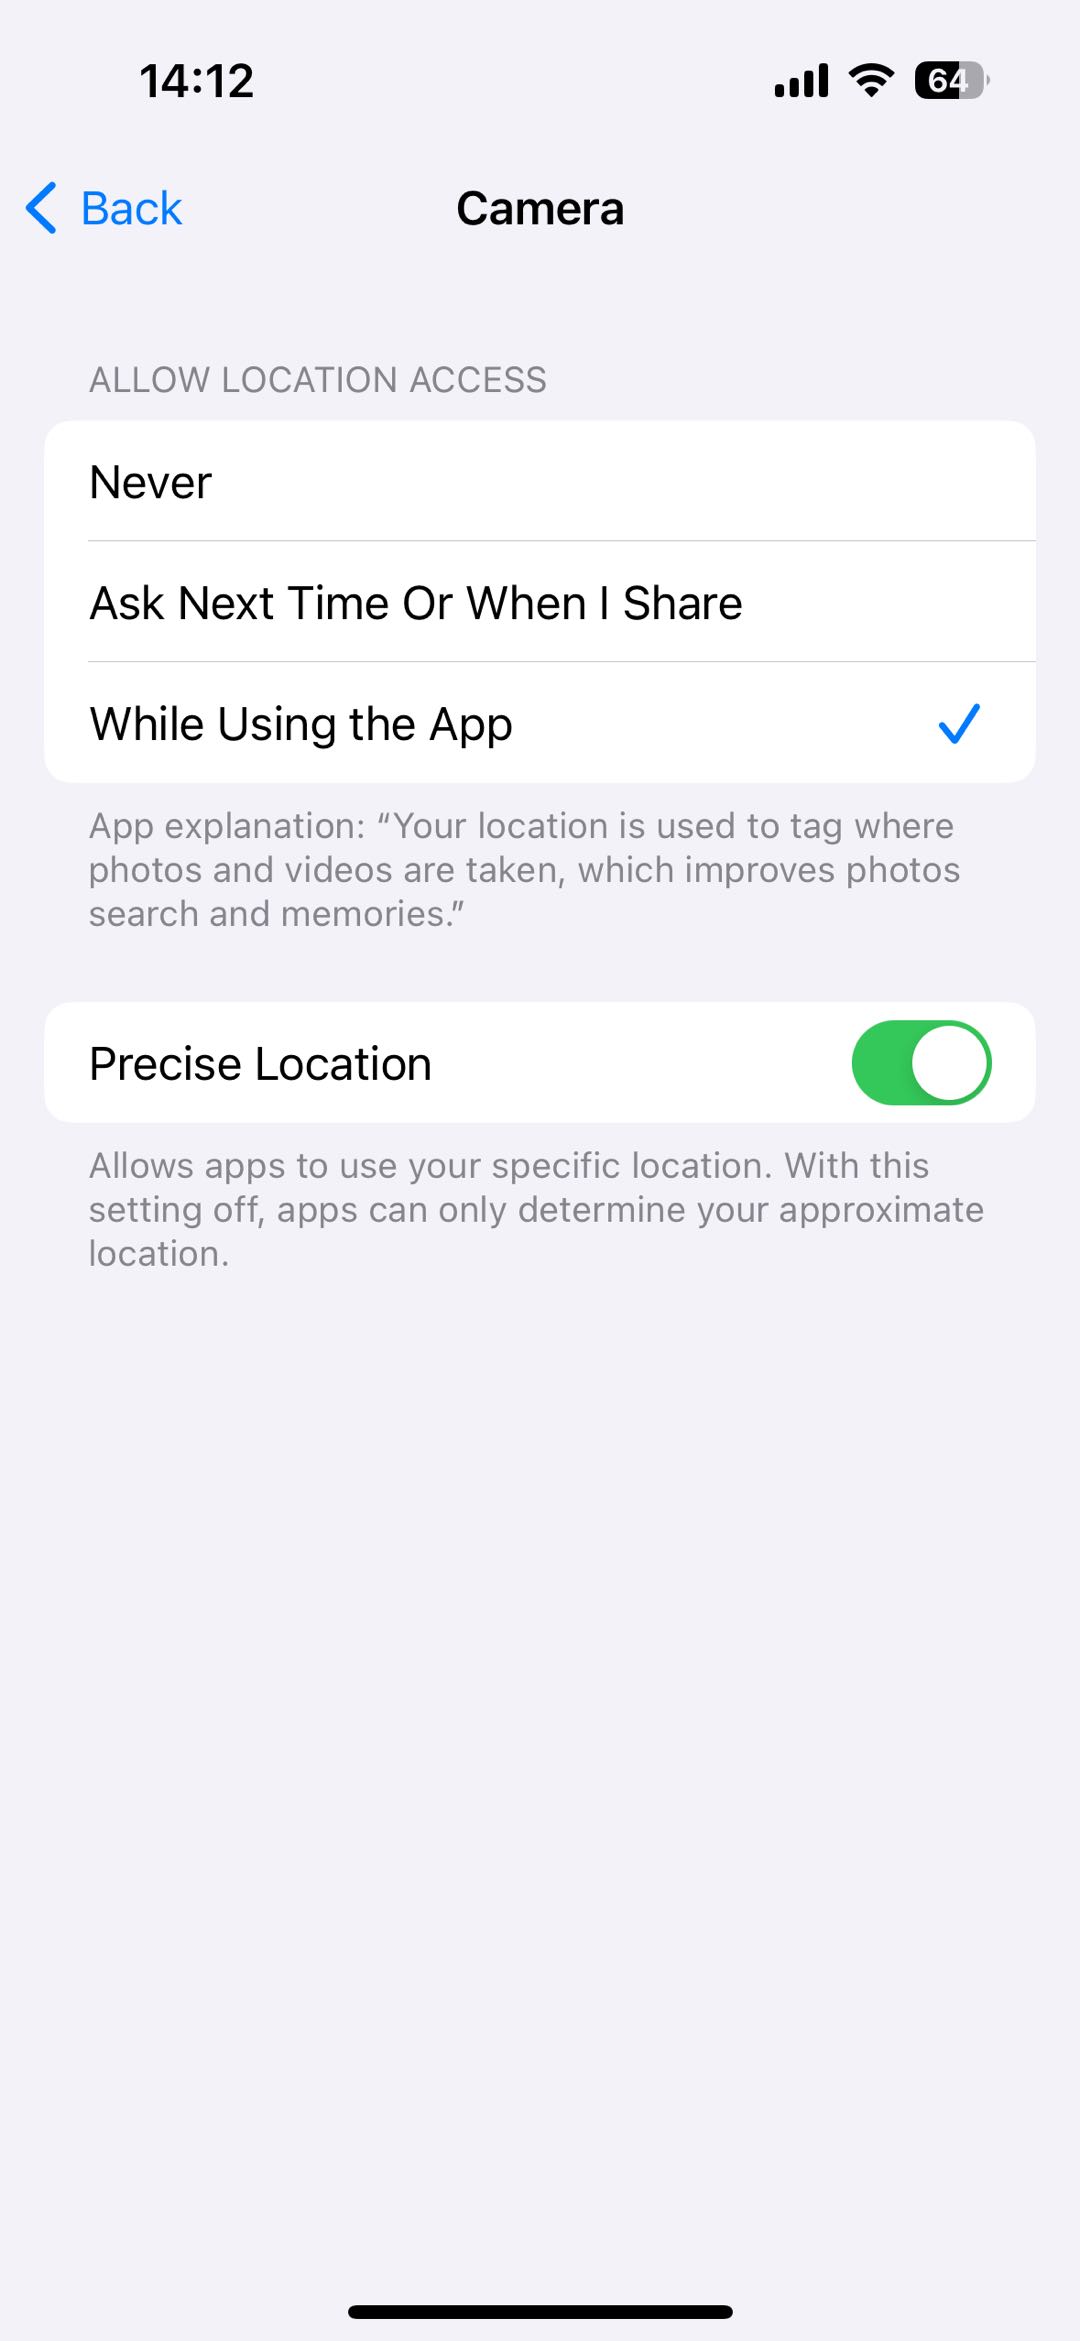
- Open “Settings” on your iPhone, scroll down and select “Privacy & Security” and tap on “Location Services” (Ensure that “Location Services” is toggled on).
- Scroll down and find your camera app in the list.
- Verify that “Always” or “While Using the App” is selected.
2.2 Grant Camera App Access to Location
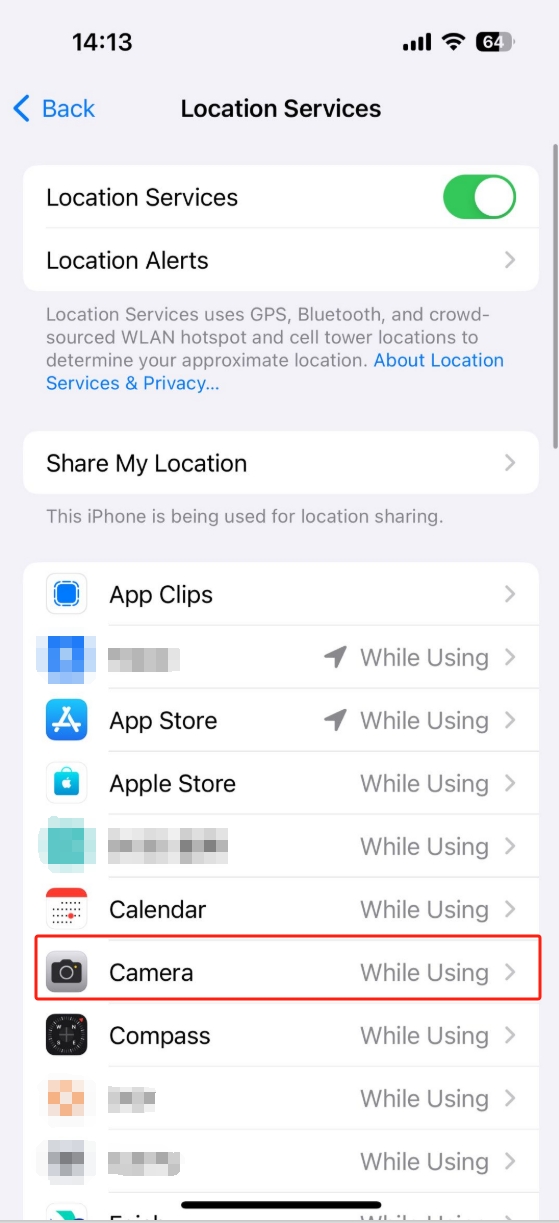
- Follow the steps above to navigate to “Privacy” > “Location Services”.
- Find your camera app in the list.
- Ensure that it’s allowed access to your location.
2.3 Reset Location & Privacy Settings
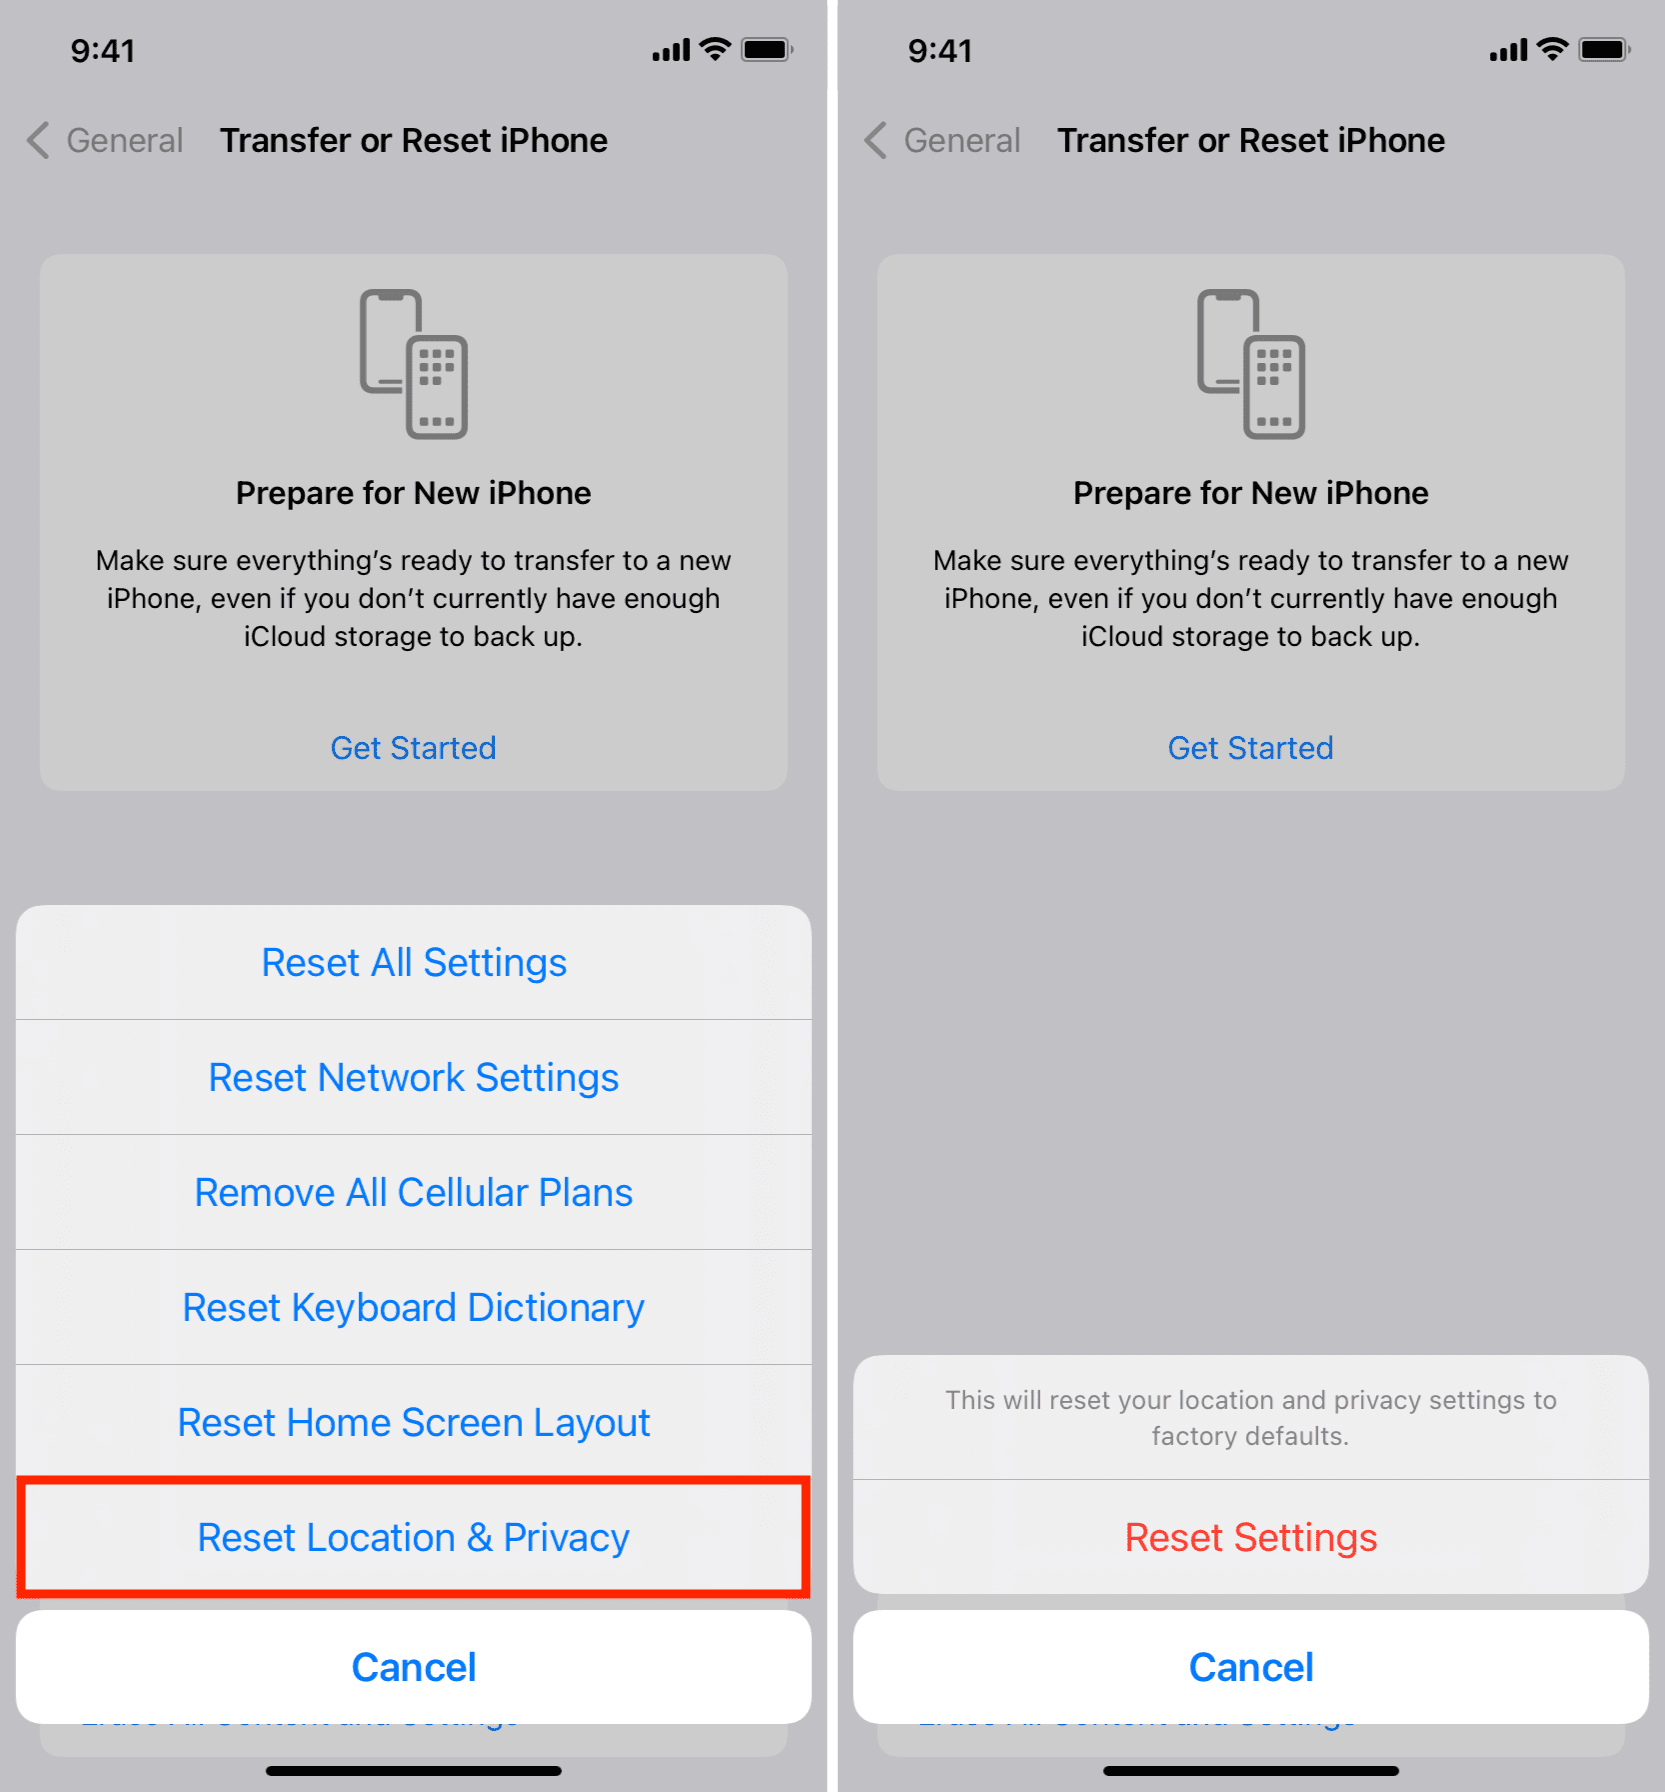
- Go to “Settings” > “General” > “Transfer or Reset iPhone”.
- Make your selection “Reset Location & Privacy” > “Reset Settings” .
- Confirm your action by entering your passcode.
2.4 Check GPS Signal
- Ensure that you’re in an open area with clear visibility of the sky.
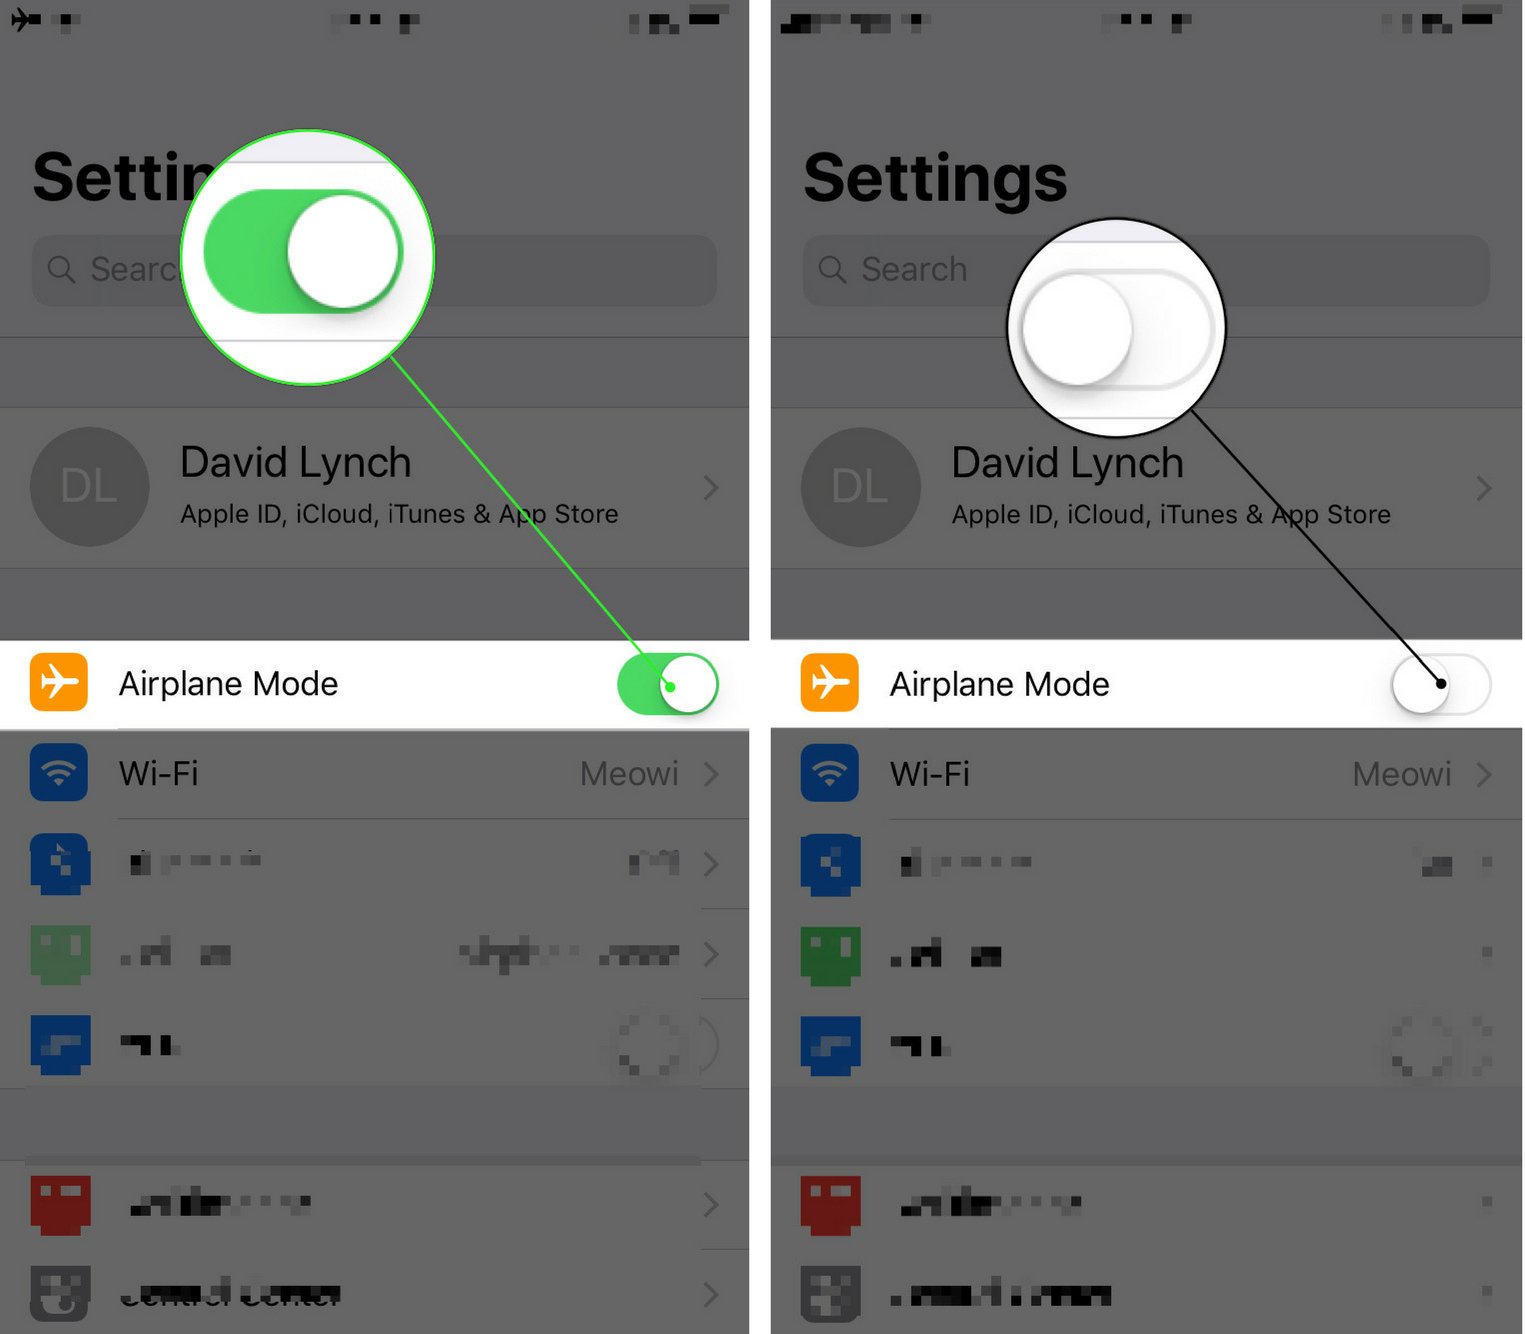
- Temporarily disable Airplane Mode if enabled.
- Restart your iPhone to refresh its GPS functionality.
2.5 Update iOS
- Sometimes, software updates contain bug fixes for issues like this.
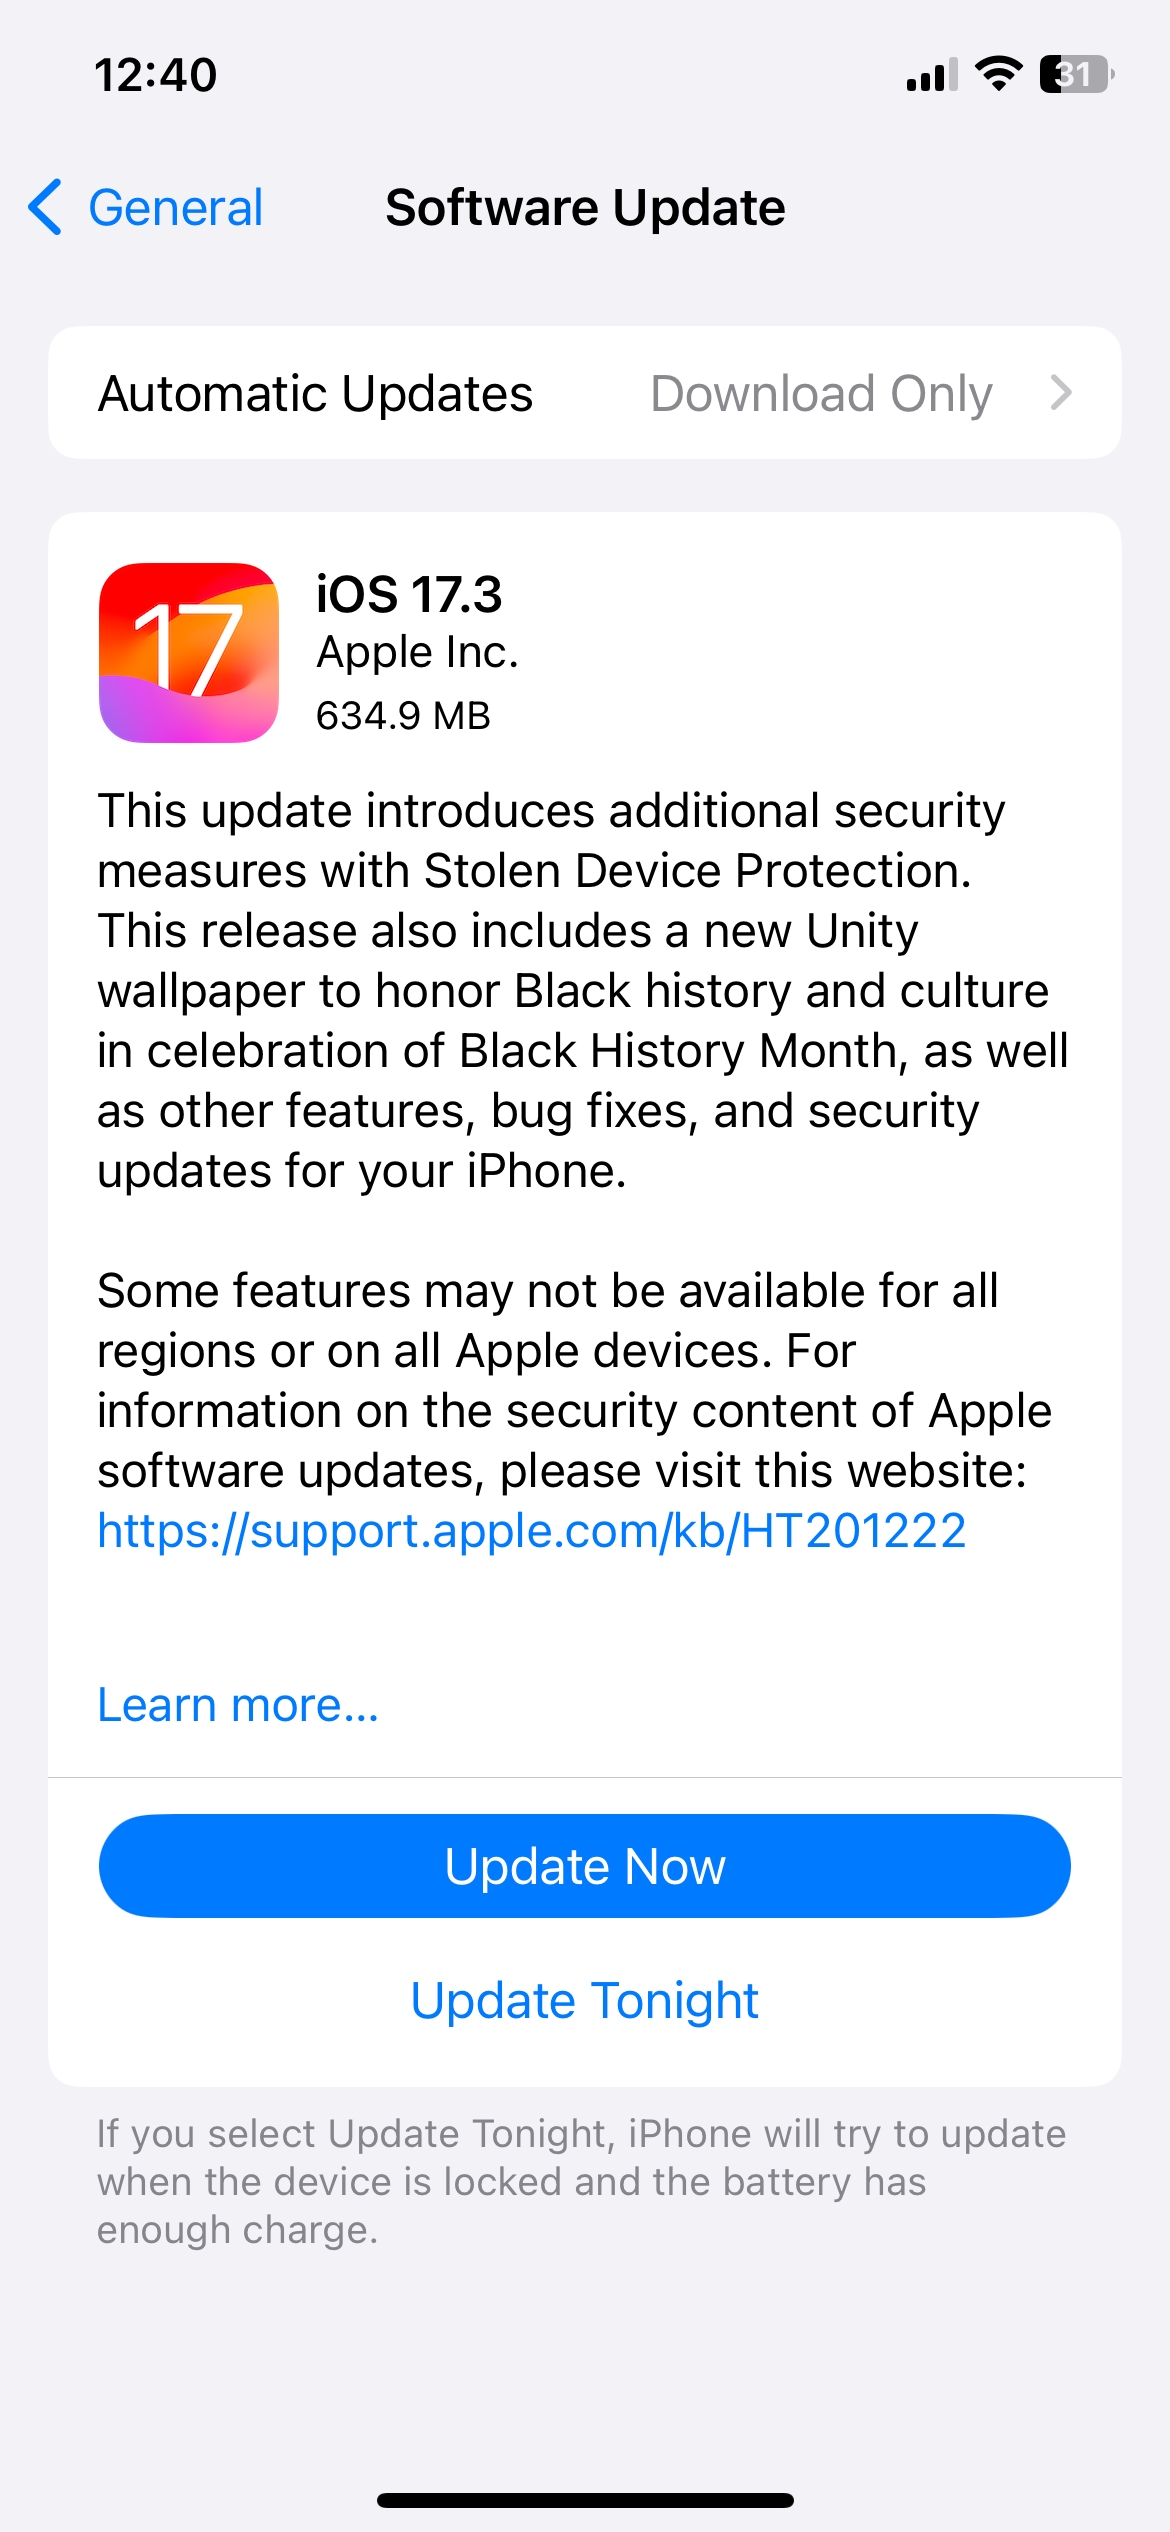
- Go to “Settings” > “General” > “Software Update” to check for and install any available updates.
3. Fixing iPhone System Issues with AimerLab FixMate
If the above solutions fail to resolve the issue and you suspect a deeper software problem,
AimerLab
FixMate
offers a comprehensive solution. This powerful tool specializes in repairing 150+ iOS system issues, including those affecting location services and camera functionality.
By following the steps below, you can effectively troubleshoot and resolve the issue of iPhone photos not showing location using AimerLab FixMate:
පියවර 1
: Get AimerLab FixMate started by installing it on your PC. Run the application after the installation is finished.
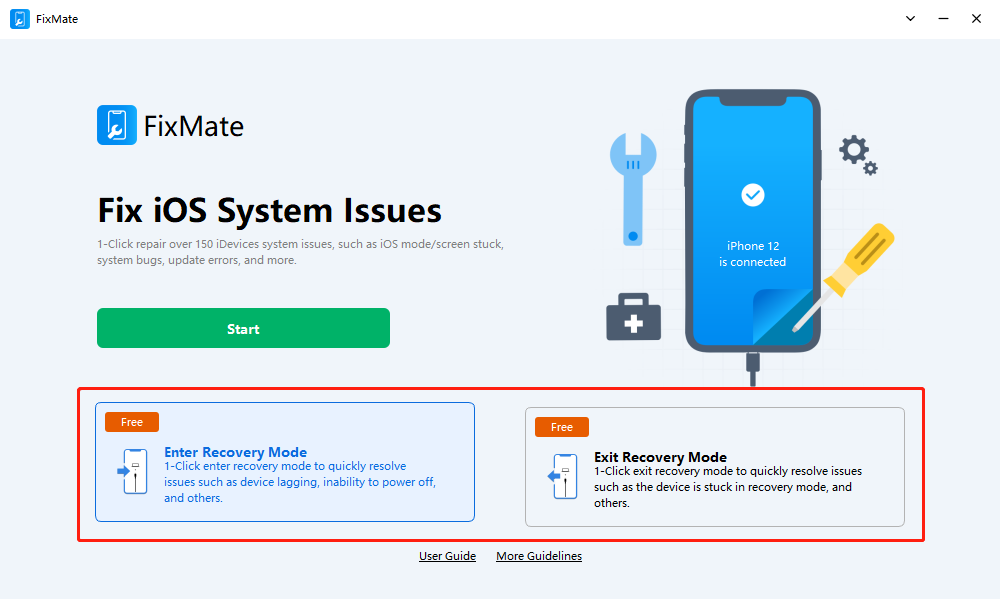
පියවර 2 : Plug in your iPhone’s USB cord to your PC, and FixMate will automatically detect your device and display it on the interface. Look for the “Fix iOS System Issues” feature, which can address deeper iOS issues by reinstalling the system without data loss. Click on the “ ආරම්භ කරන්න ” button within FixMate’s interface to proceed.

පියවර 3 : Within FixMate, click on the “ Recovery Mode ඇතුල් කරන්න ” button. This action places your iPhone into recovery mode, a necessary state for resolving various iOS issues. If your iPhone needs to get out of recovery mode, click on the “ ප්රතිසාධන මාදිලියෙන් පිටවන්න ” button. This initiates the process of leaving recovery mode and may resolve the software update issue.
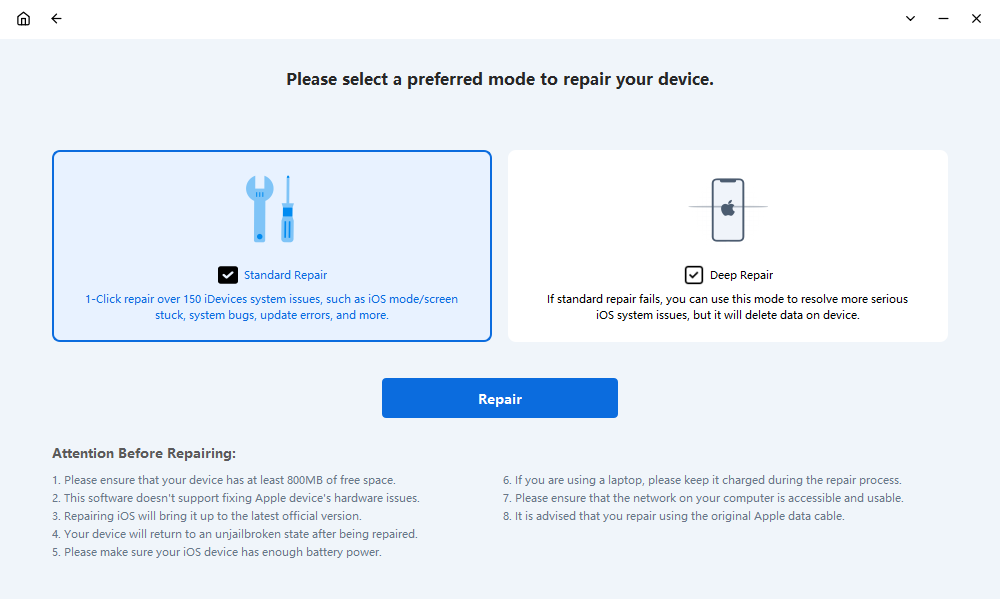
පියවර 4 : Opt for the “ සම්මත අලුත්වැඩියාව ” mode to initiate the resolution process for your software update stuck problem. If this mode fails to resolve the issue, consider trying the “ ගැඹුරු අලුත්වැඩියාව ” option, known for its higher success rate.
පියවර 5 : FixMate will identify your iPhone model and provide the most recent firmware package suitable for your device. You’ll need to click on “ අලුත්වැඩියා කරනවා ” to download this firmware.
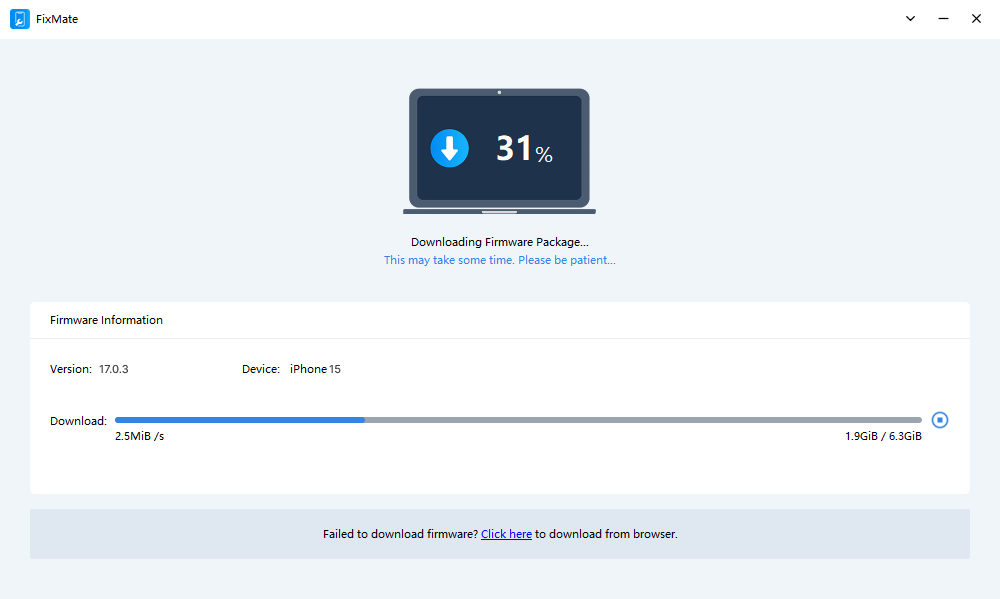
පියවර 6 : After downloading the firmware package, click on “ අළුත්වැඩියා කිරීම ආරම්භ කරන්න ” to address the software update stuck issue.
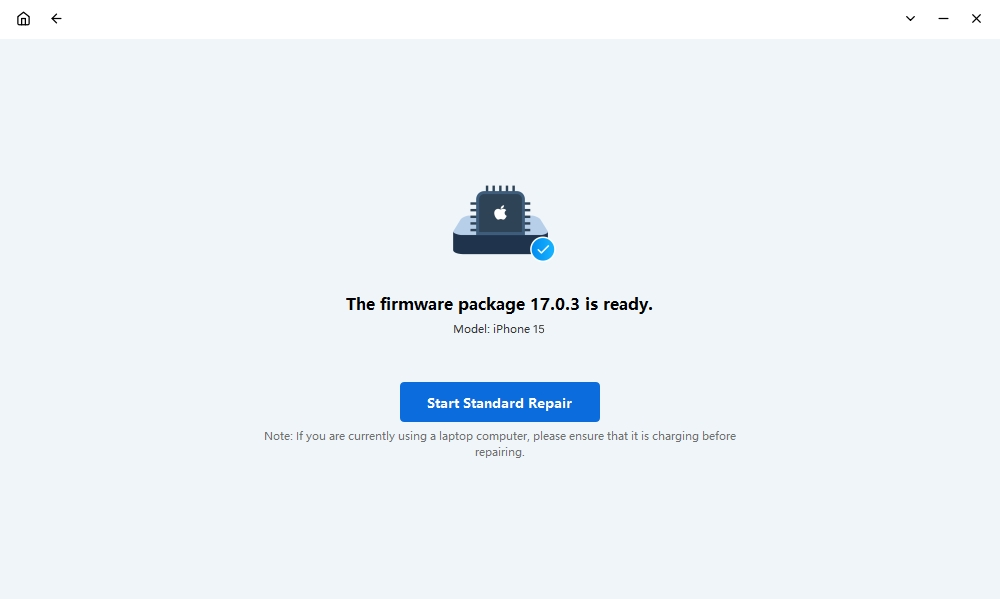
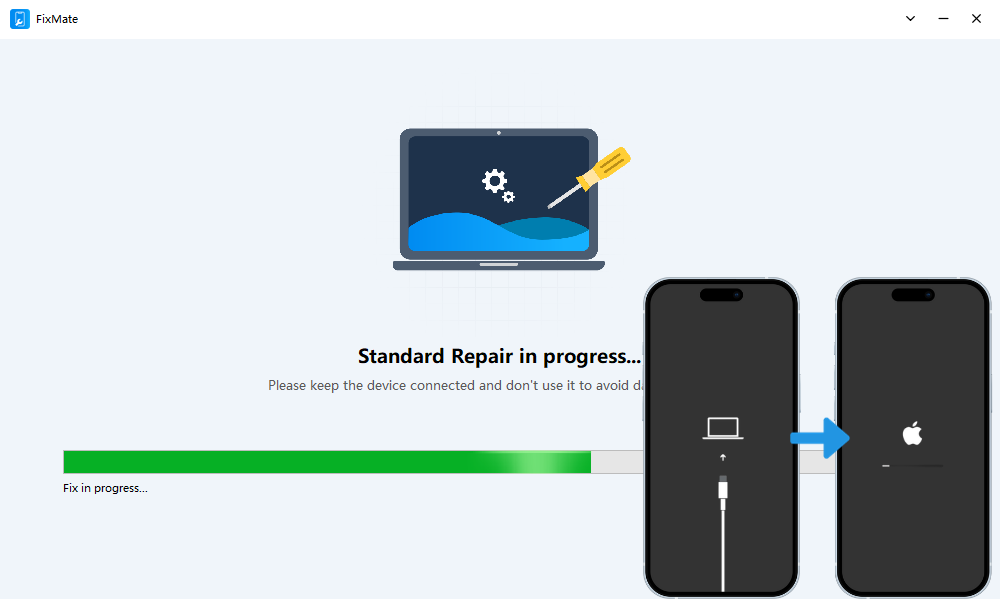
පියවර 7 : FixMate will work diligently to resolve the issue with your iPhone. Please remain patient and keep your iPhone connected to the computer, as the repair process may take a few minutes.
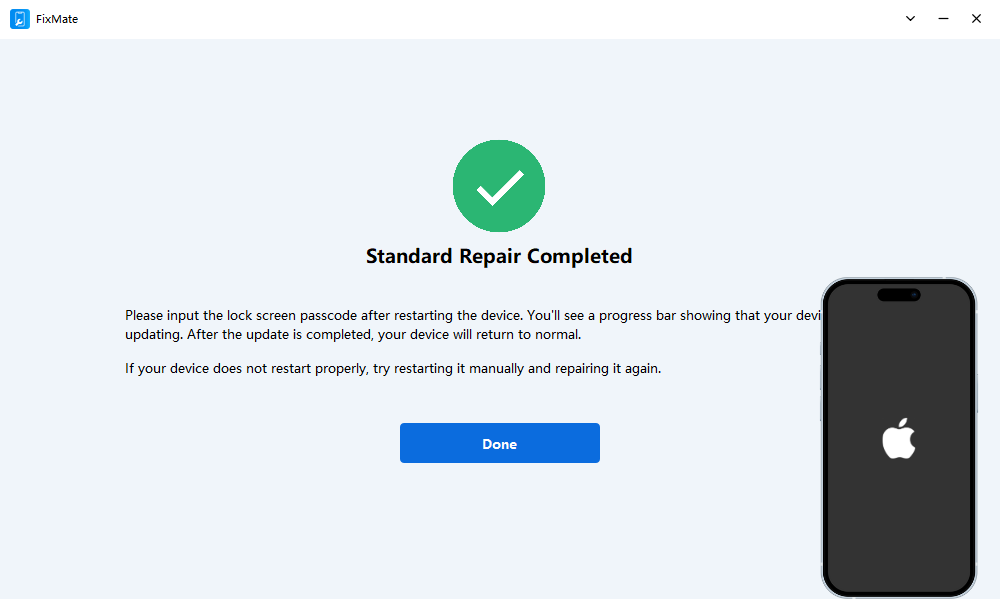
පියවර 8 : FixMate will notify you when the repair is complete, and your iPhone should then power on and operate normally. Now that you can check whether your iphone photos show location or not.
නිගමනය
The frustration of iPhone photos failing to display their location information can diminish the joy of reminiscing. Through step-by-step solutions like enabling location services, resetting location and privacy settings, and checking GPS signals, users can regain the ability to tag their photos with accurate location data.
Additionally, for more complex software issues, tools like AimerLab FixMate offer comprehensive solutions. By following the provided steps, users can address deeper iOS system issues and ensure that their iPhone functions smoothly, allowing them to capture and relive their memories with ease. Suggest downloading
AimerLab
FixMate
when you are facing any system issues on your iPhone.
- iPhone හි Pokemon Go වංචා කරන්නේ කෙසේද?
- Aimerlab MobiGo GPS Location Spoofer හි දළ විශ්ලේෂණය
- ඔබගේ iPhone හි ස්ථානය වෙනස් කරන්නේ කෙසේද?
- iOS සඳහා ඉහළම 5 ව්යාජ GPS ස්ථාන වංචාකාරයන්
- GPS ස්ථාන සොයන්නා නිර්වචනය සහ ස්පූෆර් යෝජනාව
- Snapchat හි ඔබගේ ස්ථානය වෙනස් කරන්නේ කෙසේද
- iOS උපාංගවල ස්ථානය සොයා ගැනීම/බෙදාගැනීම/සැඟවීම කරන්නේ කෙසේද?


